


Fuel tank installation components with pump and filter
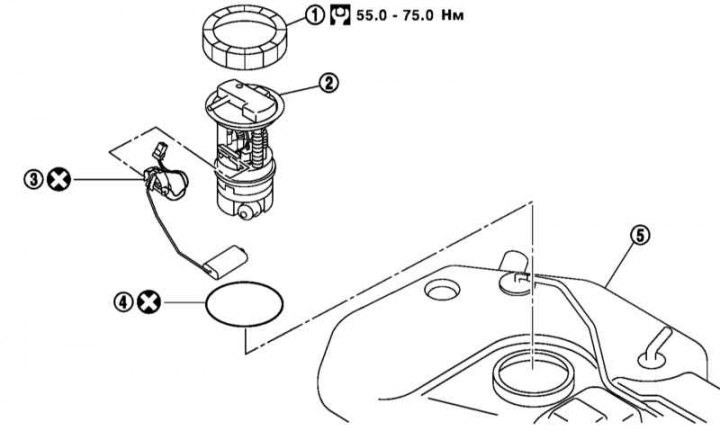
1 - Retaining ring; 2 - Assembly; 3 - Fuel level sensor unit; 4 - Sealing ring; 5 - Fuel tank
1. Empty the fuel tank and release the pressure in the fuel system (see section Relieving pressure in the fuel system).
2. Open the fuel tank filler cap.
3. Remove the rear seat (see Chapter Body) and the service hole cover.
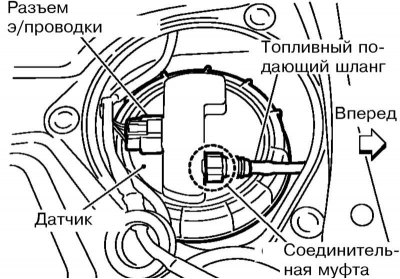
4. Disconnect the electrical wiring and fuel supply hose from the fuel level sensor. Place plastic bags over the open ends of the fuel lines.
5. Using a special tool, remove the retaining ring while simultaneously pressing on the pump assembly.
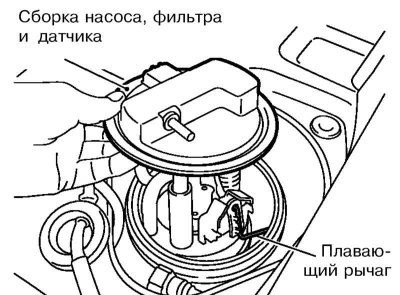
6. Remove the pump assembly from the fuel tank.
Note: Do not bend the floating arm.
7. Temporarily install the retaining ring, tightening it by hand so that the arrow mark on it points towards the rear of the vehicle.
Note: Do not remove the retaining ring until the pump, filter and sensor assembly is installed.
8. If you need to remove the fuel level sensor, disconnect the brown wiring connector, insert a screwdriver into the gap between the left side of the sensor and the mounting part, and gently press the sensor. After it comes out of the retainer, remove the sensor.
Note: Reinstallation of a removed sensor is not permitted.
9. Disassembling the fuel pump and filter is not permitted.
10. Installation is carried out in reverse order. Use new o-ring. The protrusion on the fuel pump assembly must fit into the corresponding slot in its mounting hole.
11. After installation, check the power supply system for leaks (see Chapter Vehicle settings and routine maintenance).