


Table of contents: Cleaning ↓ Examination ↓
A thorough cleaning of the cylinder head and valve train components followed by inspection will allow you to assess the scope of work required to repair the valve train.
Caution! If the engine has been overheating frequently, the cylinder head may have become warped. Check carefully for signs of head deformation.
Cleaning
1. Clean the cylinder head sealing surfaces.
2. Clean the combustion chambers, all holes and passages from carbon deposits, then wash the cylinder head with solvent.
(Data copied from web resource: «NissanBook.ru»)
3. Remove heavy carbon deposits from valves.
Examination
Attention! Before concluding that parts need to be re-ground, be sure to complete all of the inspection procedures described below.
Cylinder head
1. Carefully inspect the head for cracks, signs of coolant penetration, and other damage. If cracks are found, replace the cylinder head.
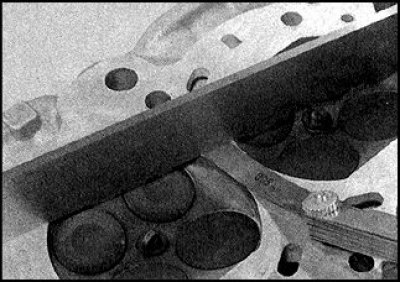
2. Check the deformation of the cylinder head split plane. If the split plane is found to be warped, the head must be ground. If the deformation of the split plane is such that the head height after grinding becomes less than the standard, replace the head.
3. Check the condition of the valve seats. In the presence of pitting (pits), cracks, traces of burnout, you will need to repair the head in the workshop of a car service station. Minor defects can be removed by lapping the valve.
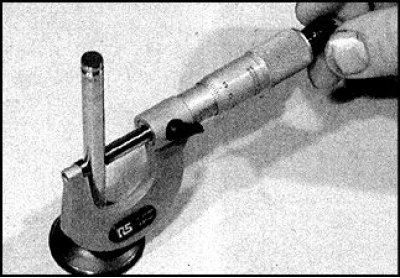
4. Check the wear of the guide bushings. To do this, insert the valve into the corresponding guide bushing and rock it from side to side. A small, barely noticeable play is acceptable.
5. If the valve play in the bushing is significant, measure the valve diameter. If the valve diameter has noticeably decreased due to wear, replace the valve. If the valve stem diameter is normal, replace the guide bushing (performed in a car service workshop).
6. If the guide bushings are to be changed, the valve seats must be reground (or to over-center) only after pressing in new bushings.
Valves
1. Check the valves for cracks, burn marks, scoring, and a bead formed due to wear on the rods. Check the bend of the valve by turning it. Check the wear of the ends. Replace the valve if any signs of wear or damage are found.
2. If this check reveals that the valve is in good condition, measure the valve diameter in several places. A noticeable difference in diameter indicates wear on the valve stem. If you find a noticeable difference in diameter in at least two places, replace the valve.
3. If the valves are in satisfactory condition, they should be ground to the seats. If the seats have only minor damage, or the seat has been reground, then lapping can be done with a fine-grained compound. A coarse-grained lapping compound should only be used if traces of deep wear or severe burnout of the seats are detected. In this case, the cylinder head and valves should be checked by an experienced specialist to determine whether the seats should be re-countersunk or the seat liners replaced (if provided).
4. Before lapping, place the cylinder head on a flat surface with the combustion chambers facing up.
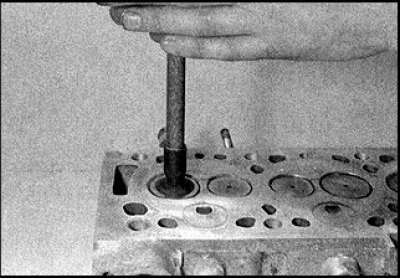
5. Apply a thin layer of lapping paste to the chamfer of the seat. Perform lapping by turning the device 180° in both directions and periodically lifting the valve to evenly redistribute the abrasive material.
6. Lapping with a coarse compound is finished after a monotonous matte belt has formed on the valve and seat chamfers. Wipe the valve and seat from the remaining paste and continue lapping with a fine compound. Lapping is considered complete when a uniform, solid, grayish belt has formed on the valve and seat chamfers. Further lapping is not allowed, since excessive wear of the seat may make subsequent repairs impossible.
7. After finishing grinding all valves, thoroughly rinse all parts with solvent.
Valve Mechanism Parts
1. Check the springs for signs of chipping and damage. A rough check of the spring condition can be done by comparing the length of the spring in a free state with the standard.
2. Check the spring deviation from the vertical using a square and compare with the standard.
3. If at least one of the springs is damaged, has an increased deviation from the vertical, or has lost elasticity, then replace all the springs in the set. Keep in mind that during major repairs, it is recommended to change the valve springs regardless of their condition.
4. Valve stem seals are changed regardless of their condition.