Designation of dimensional groups of cylinders and main bearings of the crankshaft
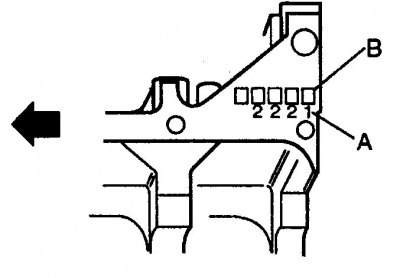
A. Designation of dimensional groups of cylinders
B. Designation of dimensional groups of crankshaft main bearings
Cleaning
1. Remove all attachments from the cylinder block, unscrew the sensors. Remove the plugs, for which drill holes in the plugs, into which screw a self-tapping screw and remove with pliers by the screw heads.
2. Carefully clean the cylinder block of gasket material residues.
3. Remove all oil channel plugs (if provided). These plugs are wrapped very tightly, so they may need to be drilled out and then driven through with a tap. When assembling the engine, replace all plugs.
4. If the surface of the cylinder block is heavily soiled, steam cleaning will be required.
5. After steaming the block, repeat the cleaning of the lubrication holes and channels. Flush all internal channels of the cylinder block with warm water until clean water flows out. Dry the block thoroughly and lubricate all split and ground surfaces to prevent corrosion.
6. If the surface of the cylinder block is moderately dirty, then you can limit yourself to washing the cylinder block with a hot soapy solution.
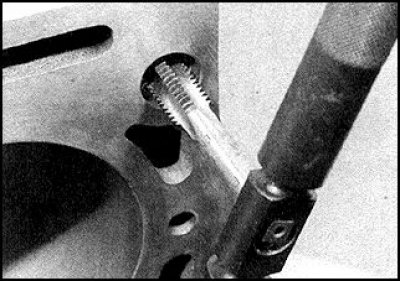
7. Clean the threaded holes and drive the threads with a tap.
8. Wrap new plugs, after lubricating them with sealant.
9. If engine assembly is delayed, lubricate the planes of the cylinder block and cover the entire block with plastic wrap.
Examination
1. Visually inspect the cylinder block for cracks and corrosion. Check the condition of the threads in the holes, mark the places with stripped threads. If there was a suspicion of a coolant leak inside the cylinder block, then the block must be tested for leaks, for which you should contact the workshop. If defects are found, repair the unit (if possible), or replace.
2. Check for chips and burrs on the inner surfaces of the cylinders. Check for a shoulder on the top of the cylinder, which indicates excessive wear on the cylinder.
3. Check for chips and burrs on the inner surfaces of the cylinders.
4. Measure the inside diameter of the cylinder 10 mm from the edge of the cylinder, parallel and perpendicular to the engine axis. Repeat measurements at distances of 60 and 100 mm from the edge of the cylinder. Based on these six measurements, determine the taper and ovality of the cylinder.
Attention! The designation of the size group is applied by stamping at the base of the cylinder block on the flywheel side. Two sets of designations are applied - from four digits, which indicate that the inner diameter of the cylinder belongs to a given size group, and the fifth digit, which refers to the beds of the crankshaft main bearings in the cylinder block. The first number in the designation for cylinders indicates the size group of the 1st cylinder, and the 4th indicates the size group of the 4th cylinder (see fig. Designation of dimensional groups of cylinders and main bearings of the crankshaft).
5. Check the condition of the pistons and rings. Determine the clearance between the piston and the cylinder as the difference between the measured diameters of the cylinder and the piston.
6. Compare results with normative. If any of the measured values is outside the standard limits, then the cylinder must be bored to the next repair diameter, and if this is not possible, then the cylinder block should be replaced. To take the most correct further action, consult a specialist.
7. If the condition of the pistons and cylinders is satisfactory, and the wear is such that the clearance between the piston and cylinder is within the normal range, then only the replacement of the piston rings will be necessary.
8. In this case, the cylinders are only honed, which ensures better running-in of the piston rings and their tight fit to the cylinder walls (carried out at a service station).