


Table of contents: Crankshaft axial play ↓ Connecting rod side clearance ↓ Clearance between piston and piston…↓ Piston ring side clearance ↓ Piston ring gap ↓ Bending and twisting of the…↓ Big end diameter of connecting rod ↓ Connecting rod small end bushing oil…↓ Cylinder block warping ↓ Inner diameter of main bearing…↓ Clearance between piston and…↓ Piston skirt diameter ↓ Crankshaft journal diameter ↓ Outside diameter of the crank pin ↓ Ovality and taper of crankshaft…↓ Crankshaft runout ↓ Connecting rod bearing oil clearance ↓ Main bearing oil clearance ↓ Protrusion of the main bearing or…↓ Flywheel deformation ↓
Crankshaft axial play
Using the indicator (1), measure the clearance between the thrust bearings and the crank arm by moving the crankshaft forward and backward.
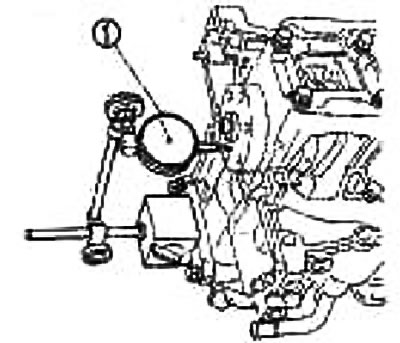
Standard: 0.060-0.260 mm
Limit: 0.3 mm
If the measured value exceeds the limit, replace the thrust bearings and measure again. If the clearance still exceeds the limit, replace the crankshaft as well.
Connecting rod side clearance
Using a feeler gauge (1), measure the side clearance between the connecting rod and the crank arm.
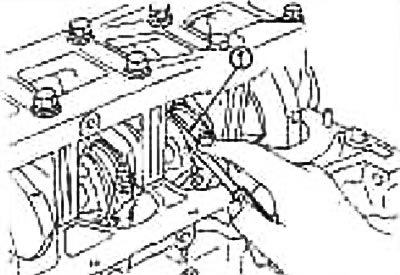
Standard: 0.050-0.420 mm
Limit: 0.5 mm
If the measured value exceeds the limit, replace the connecting rod bearings and measure again. If the clearance still exceeds the limit, replace the crankshaft as well.
Clearance between piston and piston pin
Inner diameter of piston pin hole
Using a bore gauge (1), measure the inner diameter of the piston pin hole.
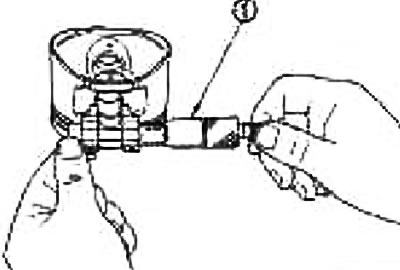
Standard: 16.008-18.012 mm
Piston pin outer diameter
Using a micrometer (1), measure the outside diameter of the piston pin.
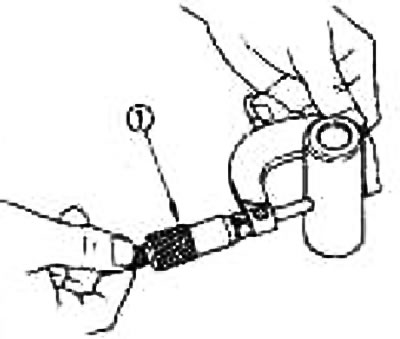
Standard: 17,996-18,000 mm
Clearance between piston and piston pin
(Piston pin clearance) = (piston pin bore diameter) - (piston pin outer diameter)
Standard: 0.008-0.016mm
* If the obtained clearance is different from the standard, replace the piston and piston pin assembly.
When replacing the piston and piston pin assembly, see section "The order of selection of pistons"
Piston ring side clearance
Using the feeler gauge (1), measure the gap between the piston ring and the groove.
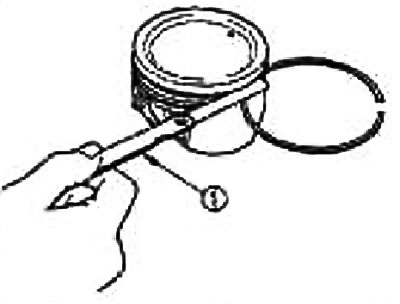
| Standard | Upper compression | 0.040-0.080 mm |
| Second compression | 0.025-0.070 mm | |
| Oil scraper | 0.030-0.140 mm | |
| Limit | Upper compression | 0.11 mm |
| Second compression | 0.1 mm |
If the measured value is different from the standard, replace the piston and/or piston assembly.
Piston ring gap
Make sure the cylinder bore is within specifications. See "Piston to Cylinder Wall Clearance" below.
Push the piston ring (1) with the piston (2) to the middle of the cylinder and use a feeler gauge to measure the gap in the lock.
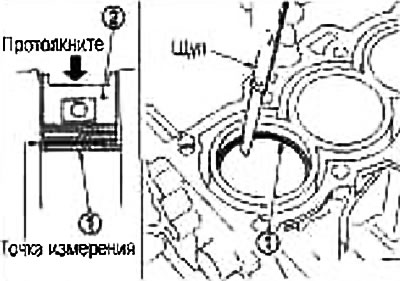
| Standard | Upper compression | 0.018-0.033 mm |
| Second compression | 0.050-0.065 mm | |
| Oil scraper | 0.020-0.070 mm | |
| Limit | Upper compression | 0.57 mm |
| Second compression | 0.85 mm | |
| Oil scraper | 0.96 mm |
If the measured value is different from the standard, replace the piston ring. If the clearance still exceeds the limit, reboring the cylinder and using a piston and piston ring of an oversized repair size.
Bending and twisting of the connecting rod
Perform a check using a connecting rod end alignment tester.
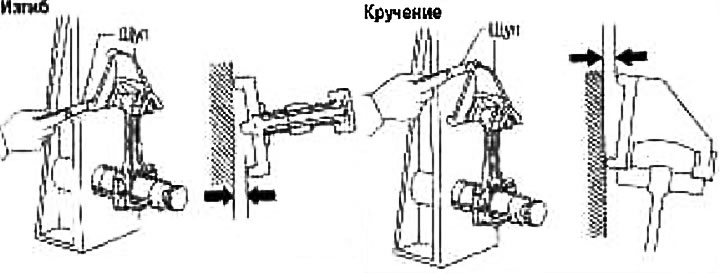
Limit bending: 0.15 mm per 100 mm of length
Torsion limit: 0.30 mm per 100 mm of length
If twist or bend exceeds the limit, replace the connecting rod assembly.
Big end diameter of connecting rod
Install the connecting rod cap without the bearing and tighten the connecting rod bolts to the specified torque. Measure the inside diameter of the big end of the connecting rod using a bore gauge (1). For the tightening procedure, see section "Assembly".
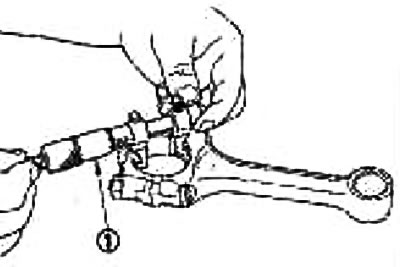
Standard: 43,000-43,013 mm
Connecting rod small end bushing oil clearance
Inner diameter of connecting rod small end bushing
Measure the inner diameter of the connecting rod small end bushing using a bore gauge (1).
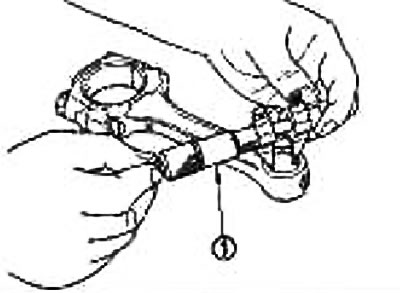
Standard: 17.962-17.978 mm
Piston pin outer diameter
Measure the outside diameter of the piston pin using a micrometer (1).
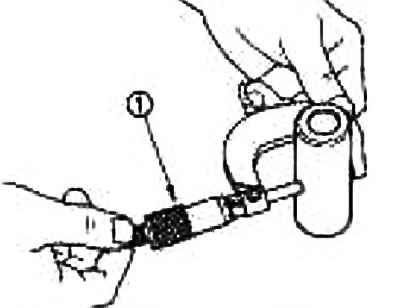
Standard: 17,996-10,000 mm
Connecting rod small end bushing oil clearance
(Connecting rod small end bushing oil clearance) = (small end inner diameter of connecting rod) - (piston pin outer diameter)
Standard: -0.018 to -0.038 mm
If the obtained value differs from the standard, replace the connecting rod assembly and/or the piston and piston pin assembly.
When replacing the piston and piston pin assembly, see section "The order of selection of pistons".
Cylinder block warping
Using a scraper, remove traces of the gasket from the surface of the cylinder block, and also remove oil, scale, carbon deposits and other contaminants.
Caution: Do not allow gasket residue to enter oil or coolant passages.
Check that the top surface of the cylinder block is not warped by taking measurements in 6 different directions using a ruler (1) and feeler gauge (2).
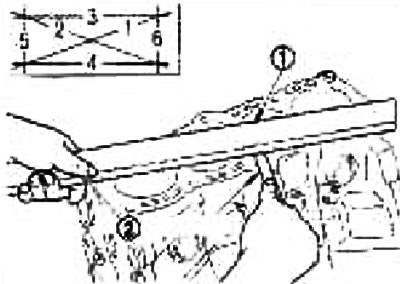
Limit: 0.1 mm
If warpage exceeds the limit, replace the cylinder block.
Inner diameter of main bearing housing
Install the covers without bearings and tighten the mounting bolts to the specified torque. For tightening procedure, see section "Assembly".
Using a bore gauge (1), measure the inner diameter of the main bearing housing.
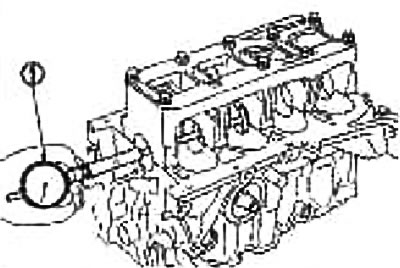
Standard: 49,000-49,016 mm
If the diameter is different from the standard, replace the cylinder block and main bearing caps as an assembly.
Clearance between piston and cylinder wall
Inner diameter of the cylinder
Using a bore gauge (1), check each cylinder for wear, out-of-roundness and taper in 6 different positions: along the "X" and "Y" axes at points "A", "B" and "C" (the "Y" is the longitudinal axis of the engine).
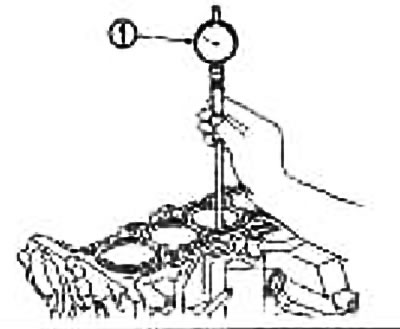 |
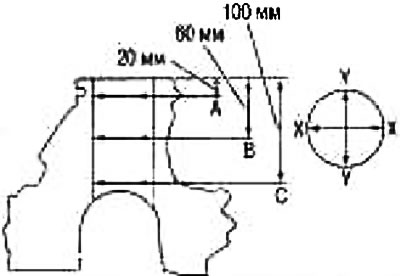 |
Standard inner diameter:
CR14DE Engine: 73.000-73.030 mm
Wear limit: 0.2 mm
Ovality (difference between "X" and "Y"), limit: 0.015 mm
Taper (difference between "A" and "C"), limit: 0.01 mm
If the measured value exceeds the limit or if there are scratches and/or scoring on the inner cylinder walls, hone or rebore the cylinder.
There are pistons with increased repair size. When using a piston with increased repair size, bore the cylinder so that the clearance between the piston and the cylinder wall corresponds to the standard.
When using an oversized piston, rebore all cylinders and install oversized rings.
Increased repair size: by 0.2 mm
Piston skirt diameter
Measure the outside diameter of the piston skirt using a micrometer (1).
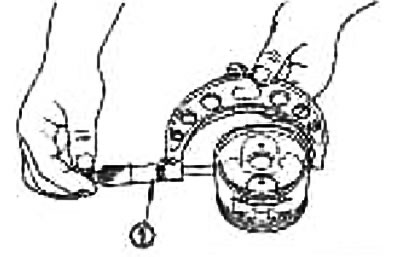
Measurement point (distance from the bottom):
CR14DE Engine: 32.3mm
CR14DE Engine, Standard: 72.980-73.010 mm
Clearance between piston and cylinder wall
Perform calculations based on the values of the piston skirt outside diameter and the cylinder inside diameter (axis "X", point "B").
(Gap) = (inner diameter of the cylinder) - (piston skirt outside diameter)
Standard: 0.010-0.030 mm
If the clearance is not within specification, replace the piston and piston pin assembly. See Section "The order of selection of pistons".
Cylinder boring
1. The cylinder size is determined by adding the clearance between the piston and the cylinder wall to the diameter "A" of the piston skirt
Calculation of the boring diameter: "D" ="A" + "B" - "C" where,
D: bore diameter;
A: measured piston skirt diameter;
B: clearance between piston and cylinder wall (standard value);
C: honing allowance 0.02 mm
2. Install the covers and tighten the mounting bolts to the required torque. Otherwise, the cylinders may become deformed during final assembly.
3. Bore the cylinders.
If any cylinder needs to be bored, all other cylinders need to be bored as well.
Don't remove too much metal in one pass: no more than 0.05mm or so.
4. Hone the cylinders to achieve the required clearance between the piston and the cylinder wall.
5. Measure the ovality and taper of the machined cylinders.
The measurement should be taken after the cylinders have cooled down.
Crankshaft journal diameter
Measure the outside diameter of the crankshaft main journals using a micrometer (1).
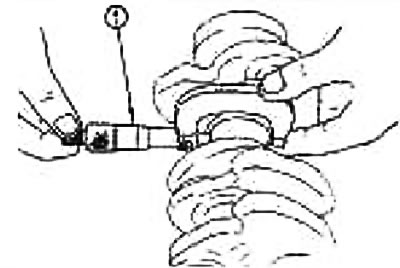
Standard: 44.954-44.970 mm
If the diameter is different from the standard, measure the oil clearance in the main bearings. Then use bearings of reduced repair size. See "Main Bearing Oil Clearance" below.
Outside diameter of the crank pin
Measure the outside diameter of the crankpins using a micrometer.
Standard: 39.961-39.974 mm
If the diameter is different from the standard, measure the oil clearance in the connecting rod bearings. Then use bearings of reduced repair size. See "Connecting rod bearing oil clearance" below.
Ovality and taper of crankshaft journals
Using a micrometer, measure all main and rod journals at 4 different points shown in the illustration.
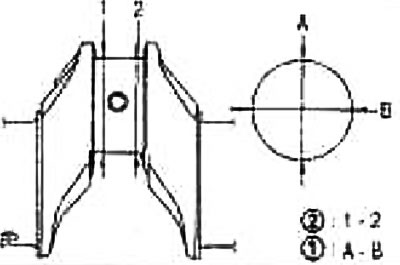
Ovality (1) is determined by the difference in size between "1" and "2" in "A" and "B".
Taper (2) is determined by the difference in dimensions between "A" and "B" in "1" and "2"
| Ovality limit (difference between "X" and "Y") | 0.005 mm |
| Taper limit (difference between "1" and "2") | 0.005 mm |
If the measured value exceeds the limit, regrind or replace the crankshaft.
In case of regrinding, measure the oil clearance of the regrinded main and/or connecting rod journals. Then select the main bearing and/or connecting rod bearing. See "Main Bearing Oil Clearance" and "Connecting Rod Bearing Oil Clearance" below.
Crankshaft runout
Place the prisms on a flat surface and install the crankshaft on them with the outer journals.
Place the indicator (1) vertically on main journal No.3.
While turning the crankshaft, read the indicator readings (maximum indicator reading).
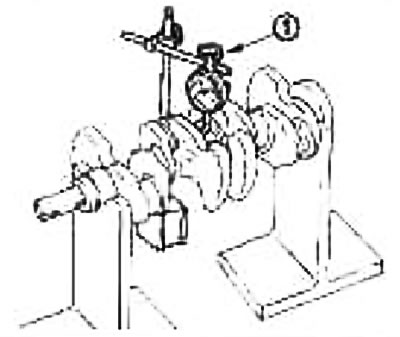
Limit: 0.05 mm
If the runout exceeds the limit, replace the crankshaft.
Connecting rod bearing oil clearance
Method of calculation
Install the bearings in the connecting rod and cap and tighten the connecting rod nuts to the specified torque. Using a bore gauge (1), measure the inside diameter of the connecting rod bearing. For tightening procedure, see section "Assembly".
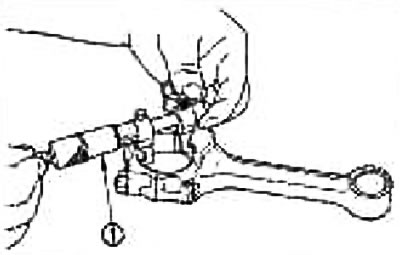
(Oil clearance) = (connecting rod bearing inner diameter) - (outside diameter of crank pin)
Standard: 0.010-0.044 mm Limit: 0.064 mm
If the clearance exceeds the limit, use bearings of reduced repair size so that the oil clearance is within the norm. See section "Instructions for the use of bearings with reduced repair dimensions".
Method using calibrated plastic wire plastigage
Completely remove oil and dust from the crankpins and bearing surfaces.
Cut the wire (1) into pieces slightly shorter than the width of the bearings, place them in the direction of the crankshaft axis, but not on the lubrication holes.
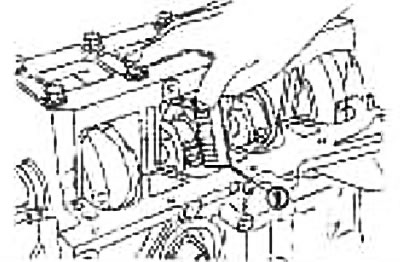
Install the connecting rod bearings into the connecting rods and caps and tighten the nuts to the specified torque. For tightening procedure, see the section "Assembly".
Caution: Do not turn the crankshaft.
Remove the caps and bearings from the connecting rod and measure the width of the wire pieces using the scale on the wire package.
Note: If the measured value exceeds the limit, take the same measures as specified in the "Calculation Method" section.
Instructions for use of bearings with reduced repair dimensions.
If the specified connecting rod bearing oil clearance cannot be achieved with standard size connecting rod bearings, use undersized bearings.
When using an undersized bearing, measure the connecting rod bearing inside diameter on the installed bearing and regrind the connecting rod journal to obtain the specified oil clearance.
Table of connecting rod bearings of reduced repair size
| Size | Thickness |
| STD (standard) | 1,504-1,508 |
| Reduced by 0.25 repair size | 1,627-1,635 |
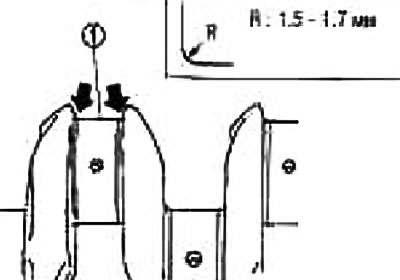
Caution: When regrinding the connecting rod journals (1) for bearings of reduced repair size, keep the rounded corners "R".
Main bearing oil clearance
Method of calculation
Install the main bearings into the cylinder block and covers and tighten the bolts to the specified torque. Measure the inside diameter of the main bearings with a bore gauge. For tightening procedures, see "Assembly".
(Oil clearance) = (main bearing inner diameter) - (crankshaft journal diameter)
Standard: 0.018-0.034 mm
Limit: 0.05 mm
If the obtained value exceeds the limit, select the required main bearing (including bearing with reduced repair size) by the inner diameter of the main bearing and the outer diameter of the crankshaft main journal and achieve the specified oil clearance in the bearing. See section "The procedure for selecting main bearings".
Method using calibrated plastic wire PLASTIGAGE
Completely remove oil and dust from main journals and bearing surfaces.
Cut the wire (1) into pieces slightly shorter than the width of the bearings, place them in the direction of the crankshaft axis, but not on the lubrication holes.
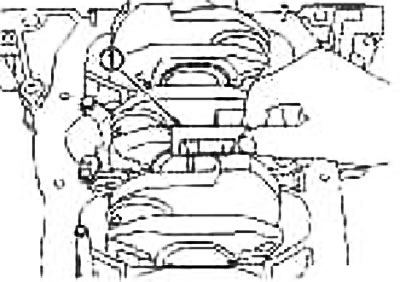
Install the main bearings into the cylinder block and covers and tighten the bolts to the specified torque. For tightening procedure, see the section above "Assembly".
Caution: Do not turn the crankshaft.
Remove the main bearing caps and bearings and measure the width of the wire segments using the scale on the wire package.
Note: If the measured value exceeds the limit, take the same measures as specified in the "Calculation Method" section.
Protrusion of the main bearing or connecting rod bearing above the parting plane.
When removing the main bearing caps or connecting rod bearings after tightening to the specified torque with the main bearings or connecting rod bearings (1) installed, the edge of the bearing should protrude above the plane. For tightening procedure, see Section "Assembly".
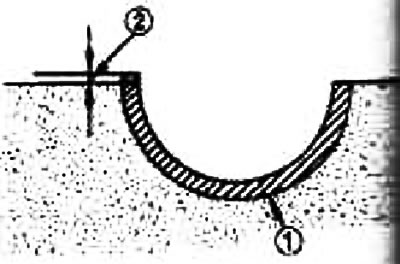
If the bearings are not in good condition, replace them.
Flywheel deformation
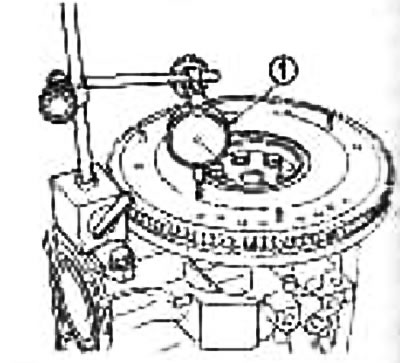
Measure the deformation of the flywheel contact surface with the clutch using an indicator (1) (maximum indicator reading).
Flywheel
Limit: 0.15 mm