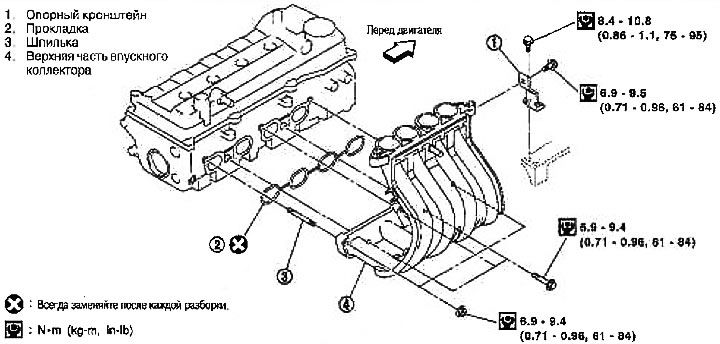
1. Support bracket; 2. Gasket; 3. Hairpin; 4. Upper intake manifold
Removing
1. Remove the air duct and air cleaner housing assembly. See section «Air cleaner and air duct».
2. Disconnect the PCV hose (between the top of the intake manifold and the valve cover) from the top side of the intake manifold.
3. Unscrew the fixing bolt of the support bracket (in front of the engine above channel No. 1).
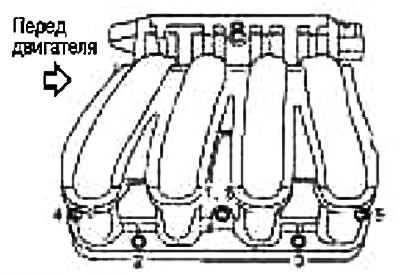
4. Loosen the nuts and bolts in the reverse order shown in the figure and remove the upper part of the intake manifold.
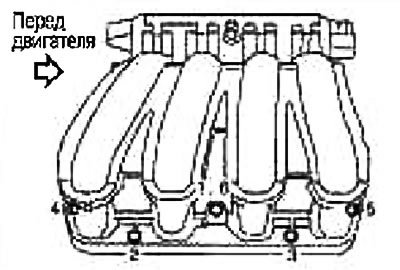
Attention: When loosening, disregard #6 shown in the figure.
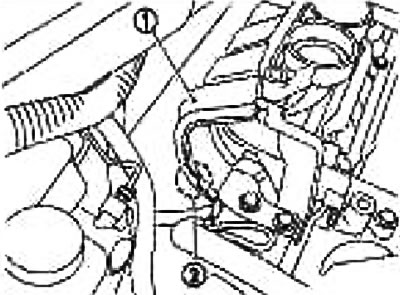
Note: Removal and installation of the #5 nut can be simplified by inserting the tool into the recommended slot (2) channel #1 (1) (The same applies to nut #4).
Installation
Installation is carried out in the reverse order of removal, taking into account the following:
Installing the upper part of the intake manifold
Check for damage or foreign particles on the contact surfaces.
Tighten the nuts and bolts in the order indicated by the numbers in the figure.
Note:
- Number #6 in the figure indicates the 2nd pass of tightening bolt #1.
- When installing the support bracket, see section «Removal and installation»