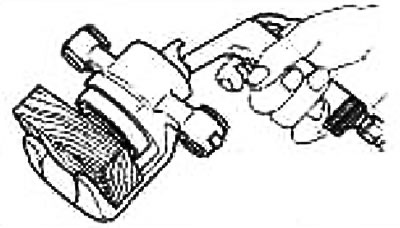
Disassembly
Attention:
- Do not pinch your fingers with the piston.
- Do not scratch the inner walls of the cylinder.
1. Place a wooden block as shown in the figure. Remove the pistons and piston boots by blowing air through the mounting hole under the connecting bolt.
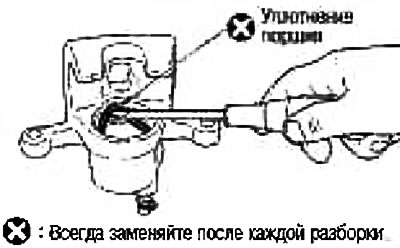
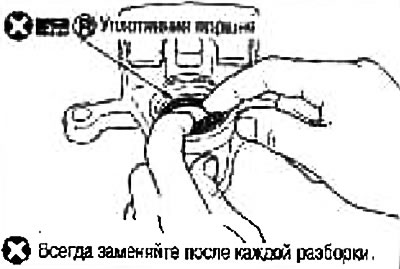
2. Use a flat-bladed screwdriver to pry out the piston seals.
Caliper check
Cylinder body
Attention:
- Use fresh brake fluid for cleaning. Do not use mineral oils such as petrol or kerosene.
- Check for wear and damage on the inner walls of the cylinder. Replace cylinder body if necessary.
Caliper bracket
Check for wear, cracks or damage. If necessary, replace the corresponding component.
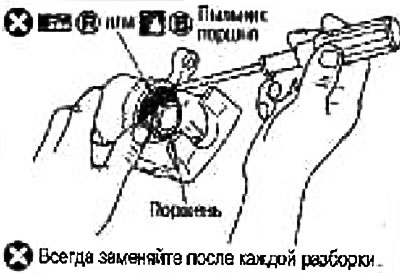
Piston
Attention:
- The sliding surface of the piston is galvanized. Don't sand it down with sandpaper.
- Check for corrosion, wear and damage on the piston surface. If necessary, replace the corresponding component.
Guide pin and guide pin boot
Check the guide pin and guide pin boot for wear, damage or cracks. If necessary, replace the corresponding component.
Assembly
Caution: Use only the specified rubber lubricant when assembling.
1. Apply a polyglycol ether lubricant to the piston seals and install them in the cylinder body.
Caution: Do not reuse piston seals.
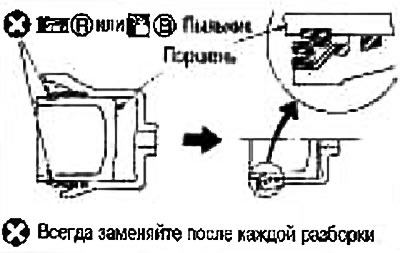
2. Apply PEG grease to the piston boots. Slide the boot onto the end of the piston, then firmly insert the tab on the cylinder side of the piston boot into the groove on the cylinder body.
Attention: Do not reuse the piston boot.
3. Apply brake fluid to the piston. Press the piston into the cylinder body by hand. Correctly insert the protrusion on the piston boot on the piston side into the groove on the piston.
Attention: Press the piston evenly. To avoid scratches on the inner walls of the cylinder, change the point of application of force.