Disassembly
1. Remove the caliper assembly from the vehicle.
2. Turn out bolts of directing fingers from the case of the cylinder, take out from a support in gathering pads with linings, covers of linings and holders of pads.
3. Remove the guide pins with anthers from the caliper bracket.
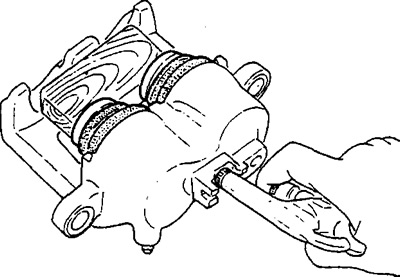
4. Place the wooden block as shown in the picture. Remove the pistons and piston boots by blowing compressed air through the mounting hole for the connecting bolt. If only one piston comes out, press it lightly into the cylinder body and blow air again.
5. Using a screwdriver, remove the piston cups.
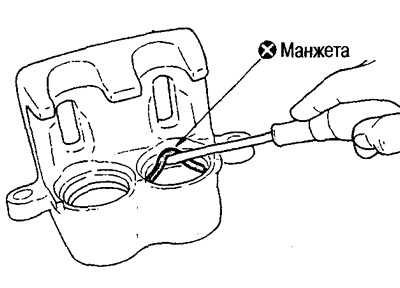
Attention: Do not scratch the inner walls of the cylinder.
Examination
Check for corrosion, wear, damage and foreign particles on the inner walls of the cylinder. Replace cylinder body if necessary.
Check for corrosion, wear, damage and foreign matter on piston surfaces. Replace pistons if necessary.
Attention:
Use fresh brake fluid for cleaning. Do not use mineral oils, petrol or kerosene.
The sliding surface of the piston is galvanized. Don't sand it down with sandpaper.
Check for wear, damage or cracks on the guide pins and boots. If necessary, replace the corresponding component.
Check for uneven wear, cracks and severe damage to the surface of the brake disc. Replace if necessary.
Check brake disc runout as follows.
(1) Attach the brake disc to the front wheel hub by securing it with the wheel nuts.
(2) Check the beat with an indicator.
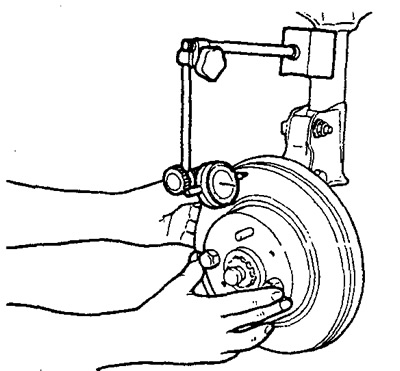
Attention: Make sure the end play is 0 mm before measuring.
(3) If the runout is significant, find the point of minimum runout by successively shifting the installation position of the brake disc on the hub by one hole.
- Measuring point: at a distance of 10mm from the outer edge of the disc.
- Max. runout: less than 0.06mm
Check the brake disc thickness with a micrometer. If the thickness differs from the standard value, replace the brake disc.
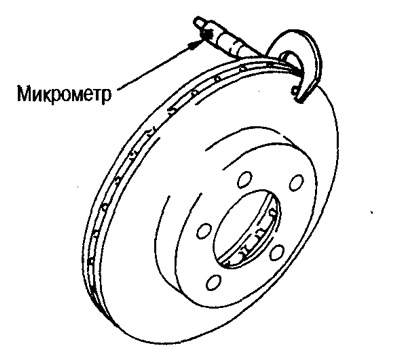
- Standard Thickness (new disc): 28 mm
- Limit wear: 26 mm
- Max. thickness fluctuation (measured at 8 points): less than 0.02mm
Assembly
Caution: Do not use Nissan Tire Lubricant during assembly (KRE0000010) And (KRE000001001).
1. Apply Nissan Tire Grease (KRE1200030) on the piston cups and insert them into the cylinder body.
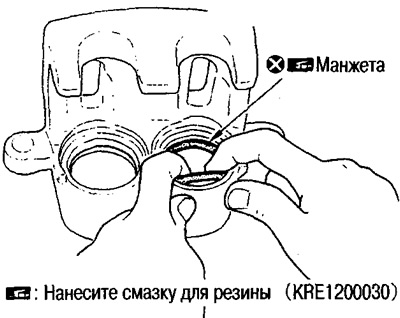
Attention: Do not reuse piston cups.
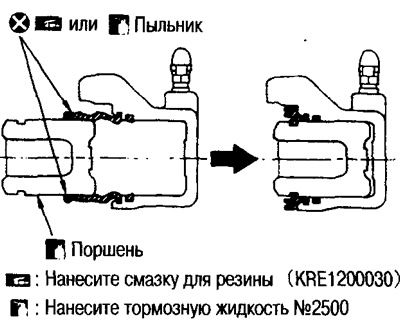
2. Apply Nissan #2500 Brake Fluid or Nissan Tire Lubricant (KRE1200030) on the piston dusters. Put the boot on the end of the piston. Correctly insert the edge of the piston boot into the groove on the cylinder body.
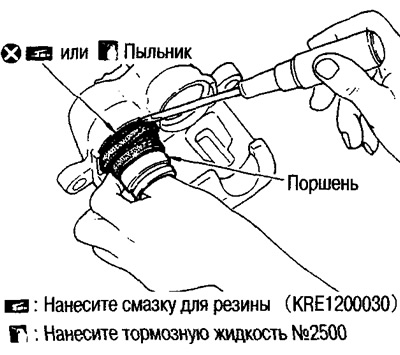
Caution: Do not reuse dusters.
3. Apply Nissan No. 2500 Brake Fluid to the piston. Press the piston into the cylinder body by hand. Correctly insert the edge of the boot into the groove on the piston.
Attention: Press the piston evenly. To avoid scratches on the inner walls of the cylinder, change the point of application of force.
4. Insert the guide pins and anthers into the caliper bracket.
5. Establish an arm of a support on an axis of a rotary fist and tighten fixing bolts with the demanded effort.
Caution: Before installing the caliper bracket to the steering knuckle shaft, wipe off the oil and grease from the seating surfaces of the steering knuckle and bracket.
6. Insert the shoe holders, shoes, shims, shim covers into the caliper bracket.
7. Install the cylinder body into the caliper bracket and tighten the guide pin bolts to the correct torque.
8. Connect a brake hose to the case of the cylinder and tighten a connecting bolt with the demanded effort.
Attention:
Do not reuse the copper washers of the connecting bolts.
Firmly insert the hose into the bore of the cylinder body.
9. After installing the caliper assembly, fill in fresh brake fluid and bleed.