Powertrain Mounting Components
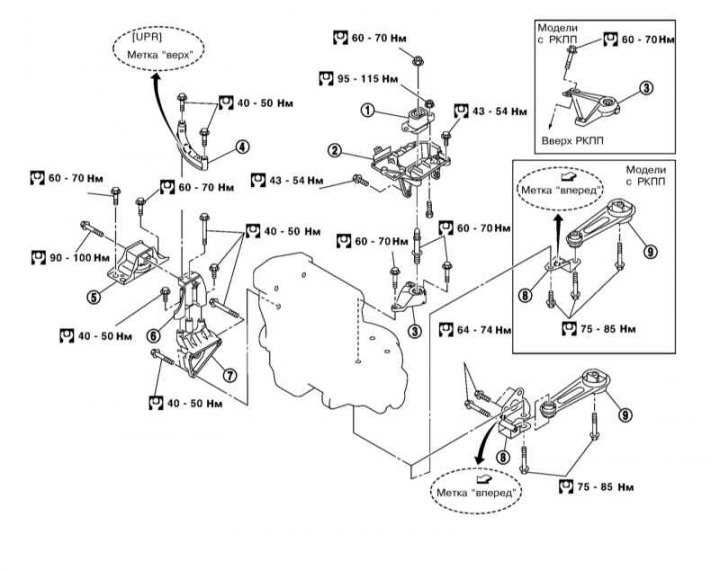
1 - Pillow of the left support; 2/3 - Bracket left support (body/transmission side); 4 - Rack of the right support; 5 - Pillow of the right support; 6/7 - Bracket right support (left/right); 8 - Rear support bracket; 9 - Rear support
1. Park the vehicle on a level, hard surface and cover the front fenders with protective covers or, for example, old blankets.
2. If not installed, install lifting eyes on the front left and rear right sides of the cylinder head. For front mounting, remove wiring bracket under fuel rail guard.
3. Relieve pressure in the supply system (see Section Depressurizing the supply system).
4. Drain engine oil and coolant (see Sections Changing the engine oil and oil filter and Coolant replacement).
5. Remove the following components:
- Front wheels and front wheel arch lockers;
- Front exhaust pipe (see chapter Power supply and exhaust systems);
- Drive belts (see Section Replacing accessory drive belts and intermediate belt rollers);
- intake air path (see Section Removal and installation of components of an inlet air path);
- rechargeable battery;
- Radiator of the cooling system (see chapter Engine cooling, heating, ventilation and air conditioning systems).
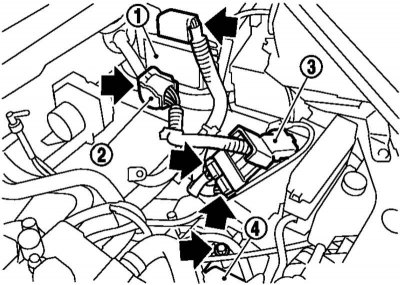
6. Remove ECM (1) from the bracket and disconnect the connector from the two ECM connectors. Disconnect connector (2) main wiring harness.
7. Disconnect the positive wire (3) battery and ground wire (4) on the transmission side.
Note. The location of the ground wire on models with manual transmission differs from that indicated in the illustration above for models with AT.
8. Disconnect the heater hose and plug it immediately to prevent loss of coolant.
9. Disconnect the select and shift cable from the transmission (models with manual transmission, see chapter Manual gearbox and clutch), or a cable of the lever of the selector of the modes АТ (see chapter automatic transmission).
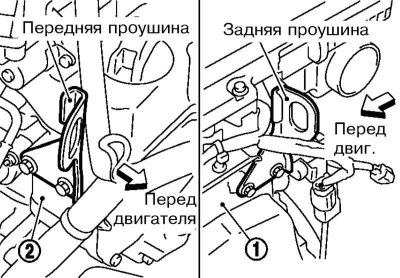
10. On models with RKPP Disconnect the clutch tube from the side of the manual transmission, plug the tube and temporarily fix it to the car body.
11. Remove the CKP sensor from the transmission.
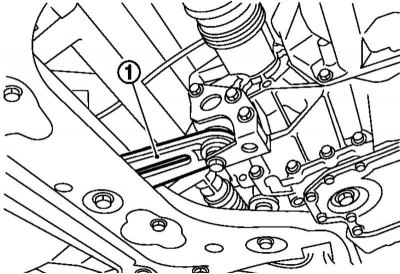
12. Remove a wire of weight between an arm of the generator and a body.
13. Remove a rack of the right support of the engine, an arm of the generator and the generator.
14. Remove the K / V compressor without disconnecting the tubes from it, take the compressor to the side and fix it with a rope on the body elements so that the tubes are not loaded.
15. Remove the protection of the fuel distribution line (see Section Removal and installation of injectors of fuel and the fuel distributive highway).
16. Disconnect the fuel line and plug it immediately to avoid fuel leaks.
17. Remove the wheel sensors and brake calipers from the steering knuckles. Hang the calipers on the body elements so that the brake lines are not loaded.
18. Remove drive shafts (see chapter Drive shafts, steering knuckles and hub assemblies) and rear engine mount.
19. Hang the engine on the winch by the lifting eyes.
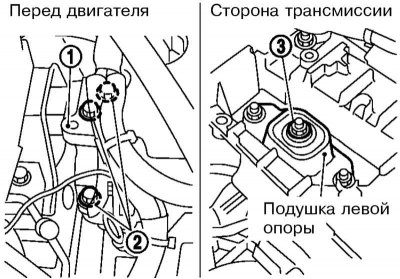
20. Remove bolts (2) top bracket (1) right engine mount and locknut (3) left support.
21. Move a lifting cart under the engine, lower the engine onto it and remove the power unit from under the vehicle.
Note. Do not touch any components in the engine compartment, so as not to damage them or the power unit.
22. Remove the starter and separate the transmission from the engine (see Section Removal and installation of the inlet pipeline or Removal and installation of the exhaust manifold, catalytic converter and lambda probe).
23. Installation is carried out in the reverse order of the dismantling of the components. Check the integrity of the support pads and replace them if necessary.
24. After installation, before starting the engine, check the levels of working fluids and correct them if necessary.
25. Start the engine and check for fuel and fluid leaks, and for abnormal noises and vibrations.
26. Let the engine idle, then turn it off and check fluid levels again.