Components
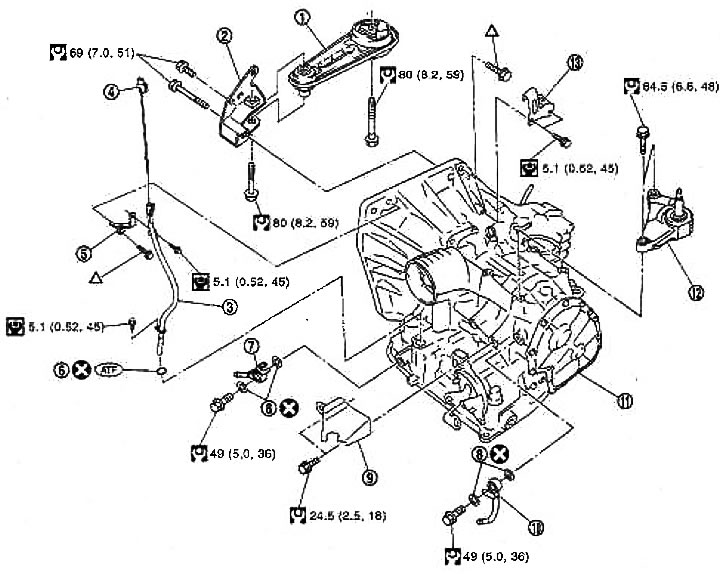
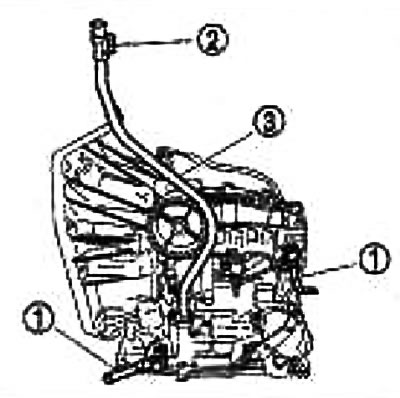
1. Rear torque rod; 2. Bracket rear engine mount; 3. Filler pipe for automatic transmission fluid; 4. Automatic transmission fluid dipstick; 5. O-ring; 6. Automatic transmission fluid radiator tube; 7. Copper washer; 8. Bracket; 9. Automatic transmission fluid radiator tube; 10. Gearbox assembly; 11. Engine support bracket (left); 12. Bracket
Removing
1. Disconnect the cable from the negative battery terminal.
2. Remove the duct (inlet), air duct and air cleaner housing. See chapter Mechanical part of the engine.
3. Disconnect the breather hose.
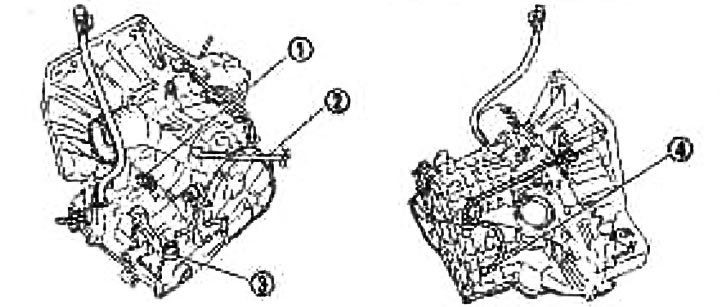
4. Disconnect the control cable (1).
5. Disconnect the park-neutral position switch connector (PNP) (2).
6. Remove bracket (3) control cable.
7. Remove the engine protection from the bottom and the wing protective pad. See chapter Body.

8. Disconnect the following connectors and wiring:
- turbo speed sensor connector (power transmission speed sensor) (1);
- body ground wiring (2);
- cord connector with terminals assy (3);
- speed sensor connector (4).
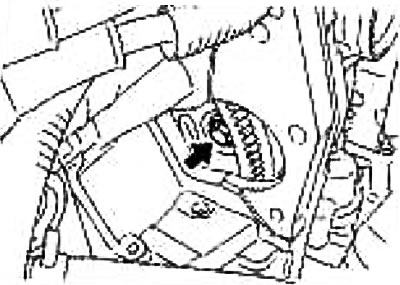
9. Remove the starter. See chapter electrical equipment.
10. Rotate the crankshaft and remove the 4 mounting bolts from the drive plate and torque converter.
Caution: Rotate the crankshaft clockwise as viewed from the front of the engine.
11. Disconnect the automatic transmission fluid cooler hoses.
12. Remove the front drive shafts. See chapter Front axle and suspension.
13. Remove the heat shield. See chapter Mechanical part of the engine.
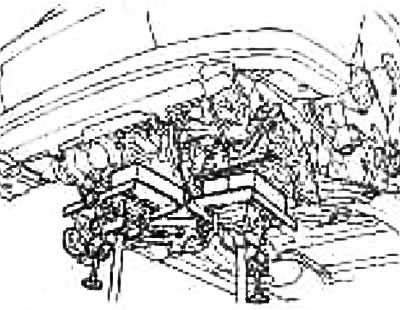
14. Support the transmission assembly with a telescopic stand.
Caution: Do not place a stand under the drain plug.
15. Remove rear torque rod and rear engine mount bracket. See chapter Mechanical part of the engine.
16. Support the engine assembly with a telescoping stand.
Caution: Do not place a stand under the drain plug.
17. Turn out fixing bolts from a transmission in gathering.
18. Remove the engine mount insulator (left). See chapter Mechanical part of the engine.
19. Remove the transmission assembly from the engine assembly.
Attention:
- Secure the torque converter to prevent it from falling.
- Fix the gearbox assembly on the telescopic stand.
20. Remove engine support bracket (left). See above «Components».
21. Disconnect the automatic transmission fluid cooler tubes (1) and remove the copper washers.
22. Remove the automatic transmission fluid dipstick (2).
23. Remove the automatic transmission fluid filler pipe (3).
24. Remove the O-ring from the automatic transmission fluid filler pipe (3).
25. Remove the bracket from the gearbox assembly.
Examination
Installing and checking the torque converter
After inserting the torque converter into the gearbox, make sure that the distance «A» within the normal range.
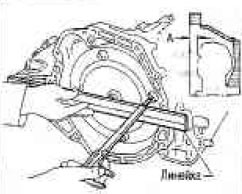
Distance «A»: 16.2 mm or more.
Installation
Installation is carried out in the reverse order of removal, taking into account the following:
Caution: Do not reuse O-ring and copper washers. See above «Components».
When installing the gearbox on the engine, tighten the fixing bolts to the required torque according to the table below:
| Na bolt | 1 | 2 | 3 | 4 |
| Number of bolts | 2 | 2 | 1 | 3 |
| Bolt length «l», mm | 40 | 44 | 69 | 49 |
| Tightening torque, Nm (kg-m) | 48 (4,9) | |||
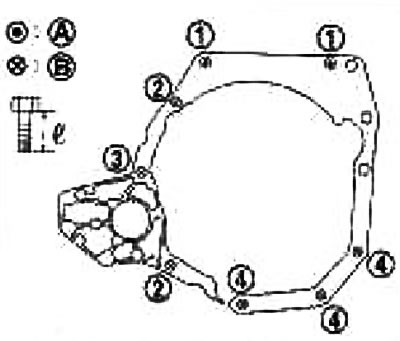
A. Gearbox to engine
B. Engine to gearbox
Align the mounting positions of the drive plate mounting bolts with the positions of the torque converter bolts and finger-tighten the bolts. Then tighten the bolts to the required torque.

Tightening torque: 51 Nm (5.2 kg m)
Attention:
- Rotate the crankshaft clockwise as viewed from the front of the engine.
- When tightening the torque converter mounting bolts after installing the crankshaft pulley bolts, check the torque of the crankshaft pulley mounting bolts. See chapter Mechanical part of the engine.
- With the torque converter attached to the driving disc, crank the crankshaft a few times and check that the gearbox rotates freely without binding.
Upon completion of installation, check for fluid leaks, check fluid level and automatic transmission positions.